

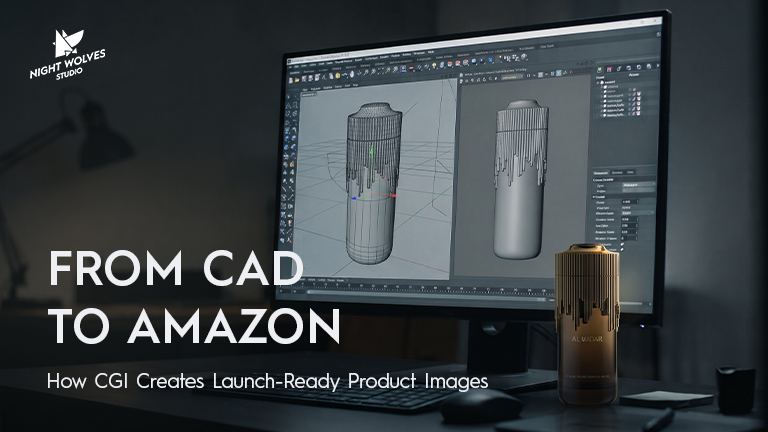
A product launch doesn’t have to wait for production samples to arrive.
With the right CAD files, material references and production specifications, a 3D model can be used to create a wide range of product visuals before the physical product is available. These can include additional product angles, close-up details, cutaway views, colour variations, catalogue imagery and marketing videos.
For brands preparing Amazon listings, this creates an opportunity to work on product content while manufacturing and logistics are still underway.
The key is knowing which images can be created with CGI, what needs to be verified against the physical product, and how to plan the entire image set before production begins.
This guide explains how to approach the process, using fishing tackle and outdoor products as examples.
1. Plan Your Amazon Product Images Before Production
Before commissioning product renders, map out every image your listing needs.
Different image positions serve different purposes. The main image introduces the product, additional images communicate its features, and supporting brand content can explain details that are difficult to show in a conventional photograph.
Here’s how CGI can fit into the process.
| Image type | Purpose | Where CGI fits |
| Main product image | Shows the product on a plain background | Depends on the current requirements for the product category and listing |
| Additional product images | Shows different angles, features, details and use cases | Suitable for many products, provided the visuals accurately represent the product |
| Colour swatches | Helps shoppers distinguish available colours and finishes | CGI can reproduce approved materials and colour variations |
| Cutaway and construction visuals | Explains internal components or product features | Useful when a feature cannot be shown clearly from the outside |
| A+ Content | Presents brand information, product benefits and comparisons | CGI can supply product visuals, subject to Amazon’s content rules |
| Product video | Demonstrates features, movement or construction | 3D animation can communicate product details that are difficult to film |
The appropriate image formats and requirements depend on the listing, product category and current Amazon policies. Check the applicable requirements before deciding which assets to render.
A useful principle: plan the complete image set first, then decide how each asset should be produced.
For example, a fishing reel may need a standard product view, a close-up of the drag adjustment, a view of the spool, a detail showing the finish and a cutaway explaining its internal mechanism.
A well-planned CGI project can produce these views from the same 3D model without requiring a separate photographic setup for every angle.
2. Establish Image Specifications Across the Range
Once the image list is defined, establish the specifications that will remain consistent across the product range.
Background and framing
For listings that require a white-background main image, the product must be presented according to the applicable marketplace rules. Where CGI is permitted, the render must accurately represent the product being sold.
Agree on the camera angle, framing, background, lighting and shadow treatment before producing the full range.
Resolution and output
Set the output dimensions according to the intended platform and use. Amazon’s image requirements should be checked for the relevant listing, and catalogue, website and print requirements may be different.
Producing appropriately sized master renders also gives the team flexibility when additional crops or formats are needed.
Consistency across SKUs
A SKU is a stock-keeping unit used to identify a product or product variation.
When a range is rendered from consistent camera positions and lighting setups, products can be presented in a coherent visual system.
This is particularly valuable when a catalogue includes multiple models, finishes and colours.
If a colour changes, the approved 3D scene can often be reused rather than rebuilding the entire production setup.
The benefit isn’t simply having more images. It’s having a repeatable visual process for the entire range.
3. Prepare Your CAD Files for CGI Product Rendering
CAD files provide the geometric foundation for many product visualisation projects. However, a CAD model is not automatically a finished marketing asset.
Before work begins, the studio needs to understand how the product is manufactured, which revision is final and which visual details need to be recreated.
Use suitable source geometry
Where available, a STEP file is often a useful starting point because it preserves precise engineering geometry.
An STL file represents geometry as a mesh of triangles. Depending on its resolution, it may not retain the smooth surfaces needed for detailed close-ups without additional work.
The best input depends on the product and the files available, so confirm the preferred format with your studio before preparing the handover.
Confirm the production revision
Make sure the CAD model corresponds to the version that will actually ship.
A technically accurate render of an outdated design can still mislead customers if a component, finish or product feature has changed.
Identify components that don’t need to be modelled
Engineering assemblies can contain screws, gears, bearings and internal components that will never be visible in the planned images.
Tell the studio which components need to appear and which can be excluded.
This helps keep the project focused on the deliverables that matter.
Supply the details CAD doesn’t contain
A CAD file may define the product’s shape without fully describing its visual finish.
For realistic results, the studio may also need:
- Material and colour references.
- Decal artwork and product graphics.
- Photographs or physical samples of surface finishes.
- Information about coatings, textures and transparency.
- Details of fishing line, rod guides, wraps or other fine components.
- Notes about differences between the engineering model and the production version.
The more clearly the source materials describe the real product, the less guesswork is required during rendering.
4. Get the Difficult Materials Right
Every product category has visual characteristics that require particular attention.
Fishing tackle offers several useful examples.
Fishing line: Thin line can disappear against the background or appear too thick if its proportions are not handled carefully.
Rod guides: Their alignment and position along the rod blank are important to the product’s appearance.
Reel bodies: Reflective surfaces need carefully controlled lighting to reveal the shape without losing important detail in reflections.
Soft plastics: Translucent materials behave differently from opaque surfaces and need an appropriate material and lighting setup.
Holographic and scale finishes: Their appearance can change significantly with viewing angle and illumination.
Other categories have their own challenges. Woven outdoor furniture, brushed-metal cookware, transparent packaging and electronic displays all require different approaches.
When evaluating a CGI studio, ask how it would handle the most difficult material or component in your range.
A general portfolio image may demonstrate overall quality, but a relevant example is more useful when assessing whether the studio understands your product.
5. Organise the Deliverables for Your Catalogue
Creating the images is only one part of the job. Those images also need to be organised, identified and delivered in a format your team can use.
For a large product range, establish a file-naming convention based on the SKU, image type and intended destination.
For example, a project might use filenames such as:
- PRODUCT123_main.jpg
- PRODUCT123_detail-01.jpg
- PRODUCT123_colour-blue.jpg
These are illustrative naming conventions, not Amazon’s required upload syntax.
If you’re using a marketplace bulk-upload workflow, confirm the exact filename and image-slot conventions in your current Seller Central process. Amazon-specific naming requirements may differ from the naming system your internal team uses for its catalogue.
A clear delivery structure can reduce manual sorting and make it easier to identify missing assets.
6. Start Creating Images Before Samples Arrive
One of the main advantages of CGI is that visual production can run alongside manufacturing.
Once the geometry, design and material references are sufficiently established, the studio can begin preparing images before physical samples are available.
This can help brands prepare:
- Product catalogue imagery.
- Website product pages.
- Retailer and distributor presentations.
- Marketing visuals for a launch.
- Additional product angles and feature illustrations.
- Approved colour variations.
If a marketplace requires a photograph for a particular main image, plan that photography separately when the production sample becomes available. The rest of the image set may still be suitable for CGI.
This approach allows teams to prepare more of their launch content in advance without assuming that every deliverable can or should be computer-generated.
What to Send Your CGI Studio
A clear handover helps the studio estimate the project and identify missing information before production starts.
| What to provide | Why it matters |
| CAD files and the confirmed production revision | Establishes the product geometry |
| SKU and colourway list | Defines the scope of the product range |
| Material samples or detailed finish references | Helps reproduce the actual surfaces |
| Colour specifications and decal artwork | Supports consistent colours and graphics |
| Required images and output formats | Defines the deliverables |
| Notes about hidden components | Helps avoid unnecessary modelling |
| Launch date and review schedule | Establishes the production timeline |
From Our Work: Product CGI for Profishiency
For Profishiency, Night Wolves Studio created catalogue product renders for its online store and a CGI launch reel presented at ICAST. These projects demonstrate how product CGI projects can support product communication through detailed still imagery and launch-focused motion content.
These projects demonstrate how CGI can support different product communication needs, from still product imagery to launch-focused motion content.
Frequently Asked Questions
Can CGI be used for Amazon product images?
CGI can be used for many product image types, including additional product views, feature illustrations and colour variations. Whether it is appropriate for the main image depends on the applicable category and listing requirements. Verify the current rules before production.
Can product images be created from CAD files?
Yes. CAD files can provide the geometry for a 3D model that is used to create product renders. Additional references may be required for colours, materials, surface finishes, labels and other details that are not fully represented in the CAD data.
Is CGI useful before a product is manufactured?
Yes. When the design and production specifications are sufficiently established, CGI can be created before physical samples are available. If the product changes, the model and images may need to be updated to reflect the final version.
What information does a CGI studio need to render a product?
The usual starting point includes CAD files or an existing 3D model, product specifications, material and colour references, required deliverables, and a production timeline. The exact requirements depend on the product and the intended images.
Can one 3D model be used for multiple product images?
Yes. A suitable 3D model can be used to create multiple camera angles, close-ups, feature views and animations. Additional work may be required when the product geometry, materials or intended output changes.
Planning a Product Launch?
If you’re preparing a new product range, Night Wolves can help you assess which visuals can be created through CGI and which may need physical photography.
Share your product range, available CAD files and launch date to start planning your image requirements.