


A product range can grow quickly. One model becomes several, each with multiple colours, finishes and variations. Suddenly, the number of images required for a catalogue, website or marketplace has multiplied.
Photographing every variation can involve repeated setup, sample handling and image production.
CGI offers another approach: create a suitable 3D model, establish the materials and finishes, and use the same production setup to generate images for multiple colourways.
The process is particularly useful for brands with large product ranges, seasonal colour updates or products that need to be presented consistently across different sales channels.
The key is to establish an accurate model, approve the materials and colours, and build a workflow that can be reused.
1. Understand How Quickly Product Images Multiply
Consider a hypothetical product available in 12 colours.
If each colour requires one main image, six additional images and one colour swatch, the total is 96 images.
A subsequent release introducing four additional colours would require another 32 images if the same image set were needed for each colour.
These figures are an illustration of production scope, not a marketplace requirement.
The actual number depends on the product range, sales channels and images needed for each listing.
Use this simple calculation to estimate your own requirements:
Number of products × number of colourways × images required per variation = total image count.
For a range with multiple models, finishes and sizes, the numbers can grow considerably.
This is where CGI becomes worth evaluating. Instead of rebuilding the entire visual production setup for each variation, a studio may be able to reuse the existing model, materials and scene.
The amount of additional work depends on how different the products and finishes are.
2. Why Consistency Matters Across a Product Range
Customers often compare several product variations side by side.
On a collection page, catalogue spread or colour selector, differences in lighting, framing and background can make a range appear inconsistent.
Even when the products themselves are well designed, variations in the images can distract from the comparison.
CGI helps establish a repeatable visual setup.
Once the camera, lighting, background and composition are approved, the same approach can be applied across the range.
This offers several practical advantages:
- Consistent framing: Products are presented using an agreed visual structure.
- Consistent lighting: Surfaces and materials are shown under the same lighting setup.
- Repeatable backgrounds: Images maintain a coherent appearance across the catalogue.
- Easier updates: Approved models and scenes can be reused for subsequent variations.
- Flexible deliverables: The same underlying model can support different views and formats.
Consistency is especially valuable when customers need to compare colours, finishes or product variants quickly.
3. Get Colour Approval Right Before Rendering the Range
Colour is one of the most important parts of product CGI.
A render can look convincing while still failing to represent the actual product accurately. This becomes a problem when customers receive an item that looks noticeably different from the image they used to make their decision.
A reliable colour-approval process helps reduce this risk.
Step 1: Start with physical references
Where possible, provide physical product samples or material swatches for each distinct finish.
Colour codes and digital references are useful, but they may not fully describe how a real material behaves under light.
Step 2: Understand how the material responds to light
Different materials interact with light differently.
A matte plastic, polished metal and holographic finish can each produce a different visual response, even when their underlying colour is similar.
Some colours can also appear different under different lighting conditions. This phenomenon is known as metamerism.
For products that will be viewed under varied lighting, consider which conditions matter most to your customers and how the physical reference should be assessed.
Step 3: Approve a representative render
Before producing every variation, create a representative image using the proposed material, lighting and camera setup.
Compare it against the agreed physical reference.
For colour-sensitive projects, use an appropriately calibrated display and a consistent review environment. A screen comparison alone cannot guarantee an exact match to a physical product under every viewing condition.
Agree on what will constitute approval before scaling the work across the range.
Step 4: Apply the approved approach to the remaining variations
Once the initial render and review process are approved, apply the agreed material and lighting standards to the rest of the range.
Keep a record of approved references and specifications so that later updates can follow the same process.
Approve the visual standard first. Then scale production.
This is more reliable than rendering an entire catalogue and discovering that the colour treatment needs to be revised across hundreds of images.
4. Give Special Finishes the Attention They Need
Not every material can be represented by changing a colour value.
Some finishes require additional modelling, material work or lighting adjustments to look convincing.
Metallic and reflective surfaces
Metallic surfaces depend on their interaction with surrounding light and reflected environments.
A convincing render needs to show the character of the finish without obscuring the product’s shape or important details.
Holographic and iridescent finishes
These finishes can change appearance depending on viewing angle and illumination.
A single still image may not communicate the full effect. Multiple views or animation may be more appropriate when the angle-dependent appearance is important.
Fluorescent colours
Fluorescent materials can be particularly difficult to represent accurately on standard displays because their perceived brightness may not be reproducible within the display’s colour range.
For these projects, agree on the physical reference and the intended visual representation before production.
Textured and soft-touch surfaces
Rubber, foam, fabric and textured plastics require more than a flat colour.
The material’s surface characteristics affect how light interacts with it and how the finished product appears in close-up images.
The correct approach depends on the material, the required level of detail and the intended viewing distance.
5. Build Reusable Materials for Future Product Updates
A well-organised CGI project can become a reusable production resource.
For example, a studio may establish approved materials for matte black, gloss white, anodised metal or a particular textured finish.
Where those materials are suitable for other products, they can serve as a starting point for future work.
This does not mean that every material can be transferred unchanged between products. Geometry, surface properties and lighting can affect the result.
However, a structured library of approved materials and production scenes can reduce repeated setup work.
The same principle applies when a brand introduces new colours for an existing product.
If the geometry remains unchanged, the studio may be able to update the relevant material and generate new images without recreating the entire scene.
The long-term value of CGI comes partly from what can be reused after the first production is complete.
6. Show Future Colours Before Samples Are Available
A suitable 3D model can also help brands visualise product variations before physical samples are manufactured.
This can support several activities.
Retailer presentations: Show proposed colours to buyers and distributors while planning the next collection.
Internal product development: Compare potential colour combinations before committing to a final selection.
Launch preparation: Prepare approved visual assets while manufacturing and logistics continue.
Catalogue planning: Develop consistent imagery for products scheduled for a future release.
These uses depend on the quality of the source model, the accuracy of the material references and the extent to which the design has been finalised.
CGI can show how a proposed variation may look. It does not replace physical validation of the manufactured product.
7. Know When CGI Is — and Isn’t — the Best Choice
CGI is not automatically the most efficient option for every product or every image.
The decision depends on the number of variations, the complexity of the product, the available source files and the intended deliverables.
CGI is worth evaluating when:
- A product has many colourways or finishes.
- Images need to remain consistent across a large catalogue.
- Product samples are unavailable or difficult to obtain.
- The brand expects regular seasonal updates.
- Additional angles or close-ups are required.
- The same model could support still images and animation.
Photography may be simpler when a product is already available, only one or two images are required, and there is little need for future variation.
Some projects benefit from a combination of both.
For example, a brand might use CGI for additional product views and catalogue variations while photographing products that require a specific physical treatment or where the relevant platform requires photography.
The right decision comes from comparing the actual production requirements rather than assuming one method is always better.
8. Treat Your 3D Models Like Part of Your Product Catalogue
If a product range is expected to grow, organise the CGI assets so they remain useful beyond the initial delivery.
Keep the master files
Agree on whether the studio will supply the final 3D models, scene files, material libraries or only the rendered images.
The appropriate deliverables depend on the project scope and agreement.
Establish naming conventions
Use consistent identifiers for products, colourways and image types.
This helps teams locate assets and identify the correct version when new images are required.
Record material approvals
Maintain a record of the approved physical references, colour specifications and material settings where these are part of the agreed handover.
Plan for future updates
If new colours or product variations are expected, discuss how the existing models and scenes will be stored and reused.
A catalogue project should be planned around both the images you need now and the updates you may need later.
What to Send Your CGI Studio
Before requesting a proposal, prepare:
- The product list and SKU identifiers.
- The number of colours and finishes per product.
- CAD files or existing 3D models.
- Colour specifications and physical material references.
- The required images for each sales channel.
- Details of special finishes or complex materials.
- The launch schedule and expected future updates.
- The approval process and requirements for master-file delivery.
This information helps the studio estimate the work, identify reusable assets and determine which parts of the range require additional production.
From Our Work: Product Catalogue CGI for Profishiency
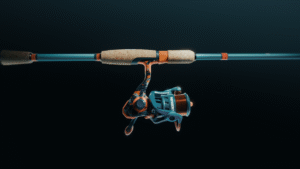
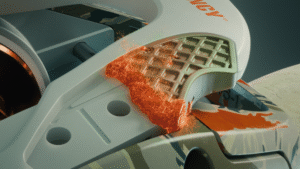
For Profishiency, Night Wolves created catalogue product renders for its online store.
The project provides an example of how product CGI can support a consistent presentation of products across an online range.
Explore the Profishiency Project




Frequently Asked Questions
Can CGI create images for every colour of a product?
In many cases, yes. If the underlying geometry remains the same, a suitable 3D model can be used to create images of different materials and colours. Special finishes may require additional work to represent their appearance accurately.
Is CGI useful for large product catalogues?
CGI can be useful for catalogues with many products, colourways or recurring updates. It can establish a consistent visual setup and allow existing models and scenes to be reused. Whether it is more efficient than photography depends on the scope and complexity of the range.
Can product colours be changed without creating a new 3D model?
If the product geometry remains unchanged, the material may be updated without rebuilding the model. If the variation changes the shape, components or surface structure, additional modelling may be necessary.
How can a brand ensure CGI colours match the real product?
Provide physical samples or appropriate material references, agree on the review conditions and approve a representative render before producing the full range. A calibrated display and consistent review setup help, although a screen cannot reproduce every physical material exactly.
Should a brand keep its 3D models after a CGI project?
For brands expecting future product updates, retaining access to the relevant master files can be valuable. Agree on the files supplied, ownership, usage rights, storage arrangements and any additional fees in the project agreement.
Planning a Large Product Range?
If you’re managing multiple SKUs, seasonal colours or recurring catalogue updates, Night Wolves can help assess how CGI could fit into your production workflow.
Share your product list, colourways and existing CAD files. We’ll help you identify where reusable 3D models could support your catalogue.
Discuss Your Product Catalogue
Part of our launch-ready product content series: